Note-taking with Typst and Neovim in 2026
More than two years ago, I wrote an article about the process of taking notes with Typst in Neovim; soon after, it became the most popular post on this blog.1 Since then, however, the contents of that article have become outdated, so I’m writing this as an updated version of that post. The goal of this article is to again document how I write lecture notes in Typst, but now with the tooling of 2026.
Now that I’ve spent two years using Typst for taking notes, I can say that I’m quite happy with it. I’m at the level where I can effortlessly type notes as fast (sometimes faster) than instructors can write on the board, including mathematical notation. I also use Typst when typing up homework.
Recap
First, let’s recall the goals for my note-taking.
During lectures, I take notes in real time on my laptop, and I do not spend time after class to clean up my notes. This is a real example of how my notes look like (click for more detail):
Because of the way I write notes, it has to be fast and efficient, otherwise I can’t keep up with the lecture. More precisely, the following are my criteria for a good note-taking setup:
Taking notes should be convenient. That is, I can open my notes and start writing almost immediately. The system should be fast and responsive.
The syntax for writing notes should be easy to remember and to write. If the syntax for common things like fractions are painful to type, I’d rather use plain text or handwritten notes.
I need my notes to support math, figures, and related features for my courses.
Originally, I was quite inspired by Gilles Castel’s system which uses LaTeX for note-taking. Unfortunately, LaTeX fails some of the criteria above; it compiles slowly, which is inconvenient, and it has cryptic, weird syntax from decades ago.2 So when I tried to write LaTeX, I ended up just giving up and writing plain text documents, because they are simply more convenient to write.
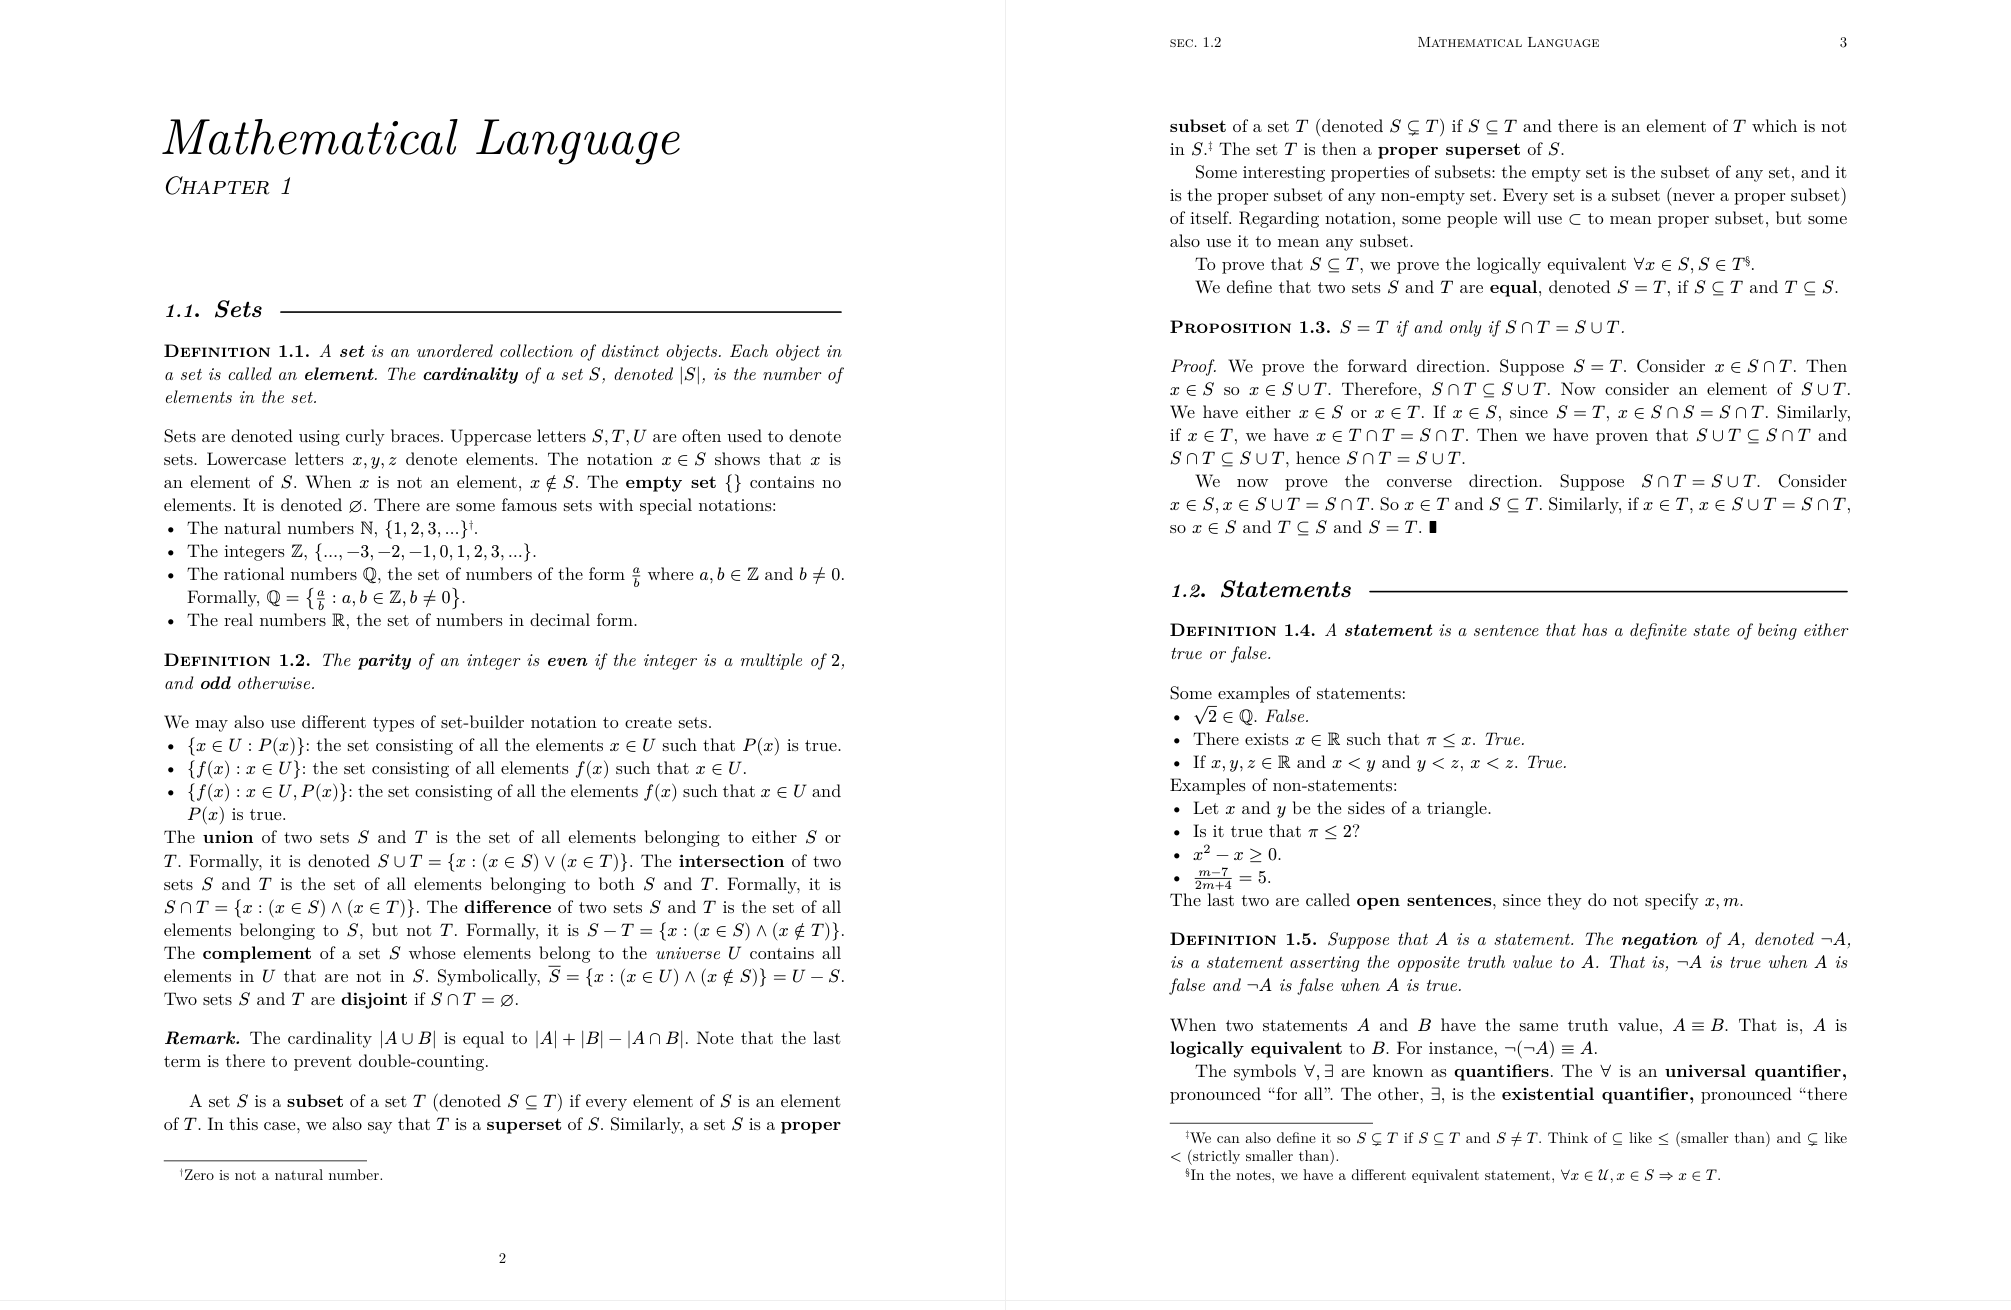
Then, I found Typst, which is sort of a mix between LaTeX and Markdown. On one hand, just like LaTeX, it’s designed for writing about math and other technical subjects, so it supports equations and figures. On the other hand, like Markdown, Typst has simple syntax. For instance, compare the notation for lists:
LaTeX:
\begin{enumerate}
    \item This is the first list item.
    \item Another entry.
    \item A last entry.
\end{enumerate}
Typst:
+ This is the first list item.
+ Another entry.
+ A last entry.
The Typst notation requires much less typing than the LaTeX notation. This is just one example; I would say that in general writing things in Typst is less wordy than writing it in LaTeX.
So, according to my criteria for a good note-taking system, Typst is the best, which is why I use it.
Compiling Typst in Neovim
Note:
This post focuses on local compilation, integrated with an editor (Neovim). For those who don’t live in the terminal, Typst has a closed-source web app, which is equivalent to Overleaf for LaTeX. The web app does have basic Vim binds, if that is what you need.
Let’s get started writing Typst.
Once you have Typst installed,
you can already start writing in a .typ document with your favourite text editor.
Run typst watch document.typ, and Typst will compile to document.pdf.
There is no boilerplate required; just start writing text.
This process is fine, but navigating directories and opening a text editor, then a PDF reader can be slow. I wrote above that I want to be able to immediately write, and that is indeed possible with the workflow I use.
In this video, I demonstrate how I can start writing notes in less than 10 seconds:
In this section, I’ll show how you can also integrate Typst to your editor like this.
Typst watch
I still use the same setup as I did in 2023: I have VimScript binds that open
typst watch in a tiny side pane, and open a PDF reader (Zathura) to view the
output besides the editor.
function GitRoot()
    return fnamemodify(finddir('.git', ";"), ":h")
endfunc

" compile typst doc on write
function TypstWatch()
       vsp
       vertical resize 20
       exec 'terminal ' .. 'typst watch --root ' .. GitRoot() .. " " .. expand("%:")
       exec "norm \<c-w>h"
endfunc

nnoremap <silent> <leader>fc :call TypstWatch()<cr>

nnoremap <silent><leader>fr :silent exec "!zathura --fork " . expand("%:p:r") . ".pdf &"<cr>
Every time I save the Typst source file, it compiles and shows the result in the Zathura window:
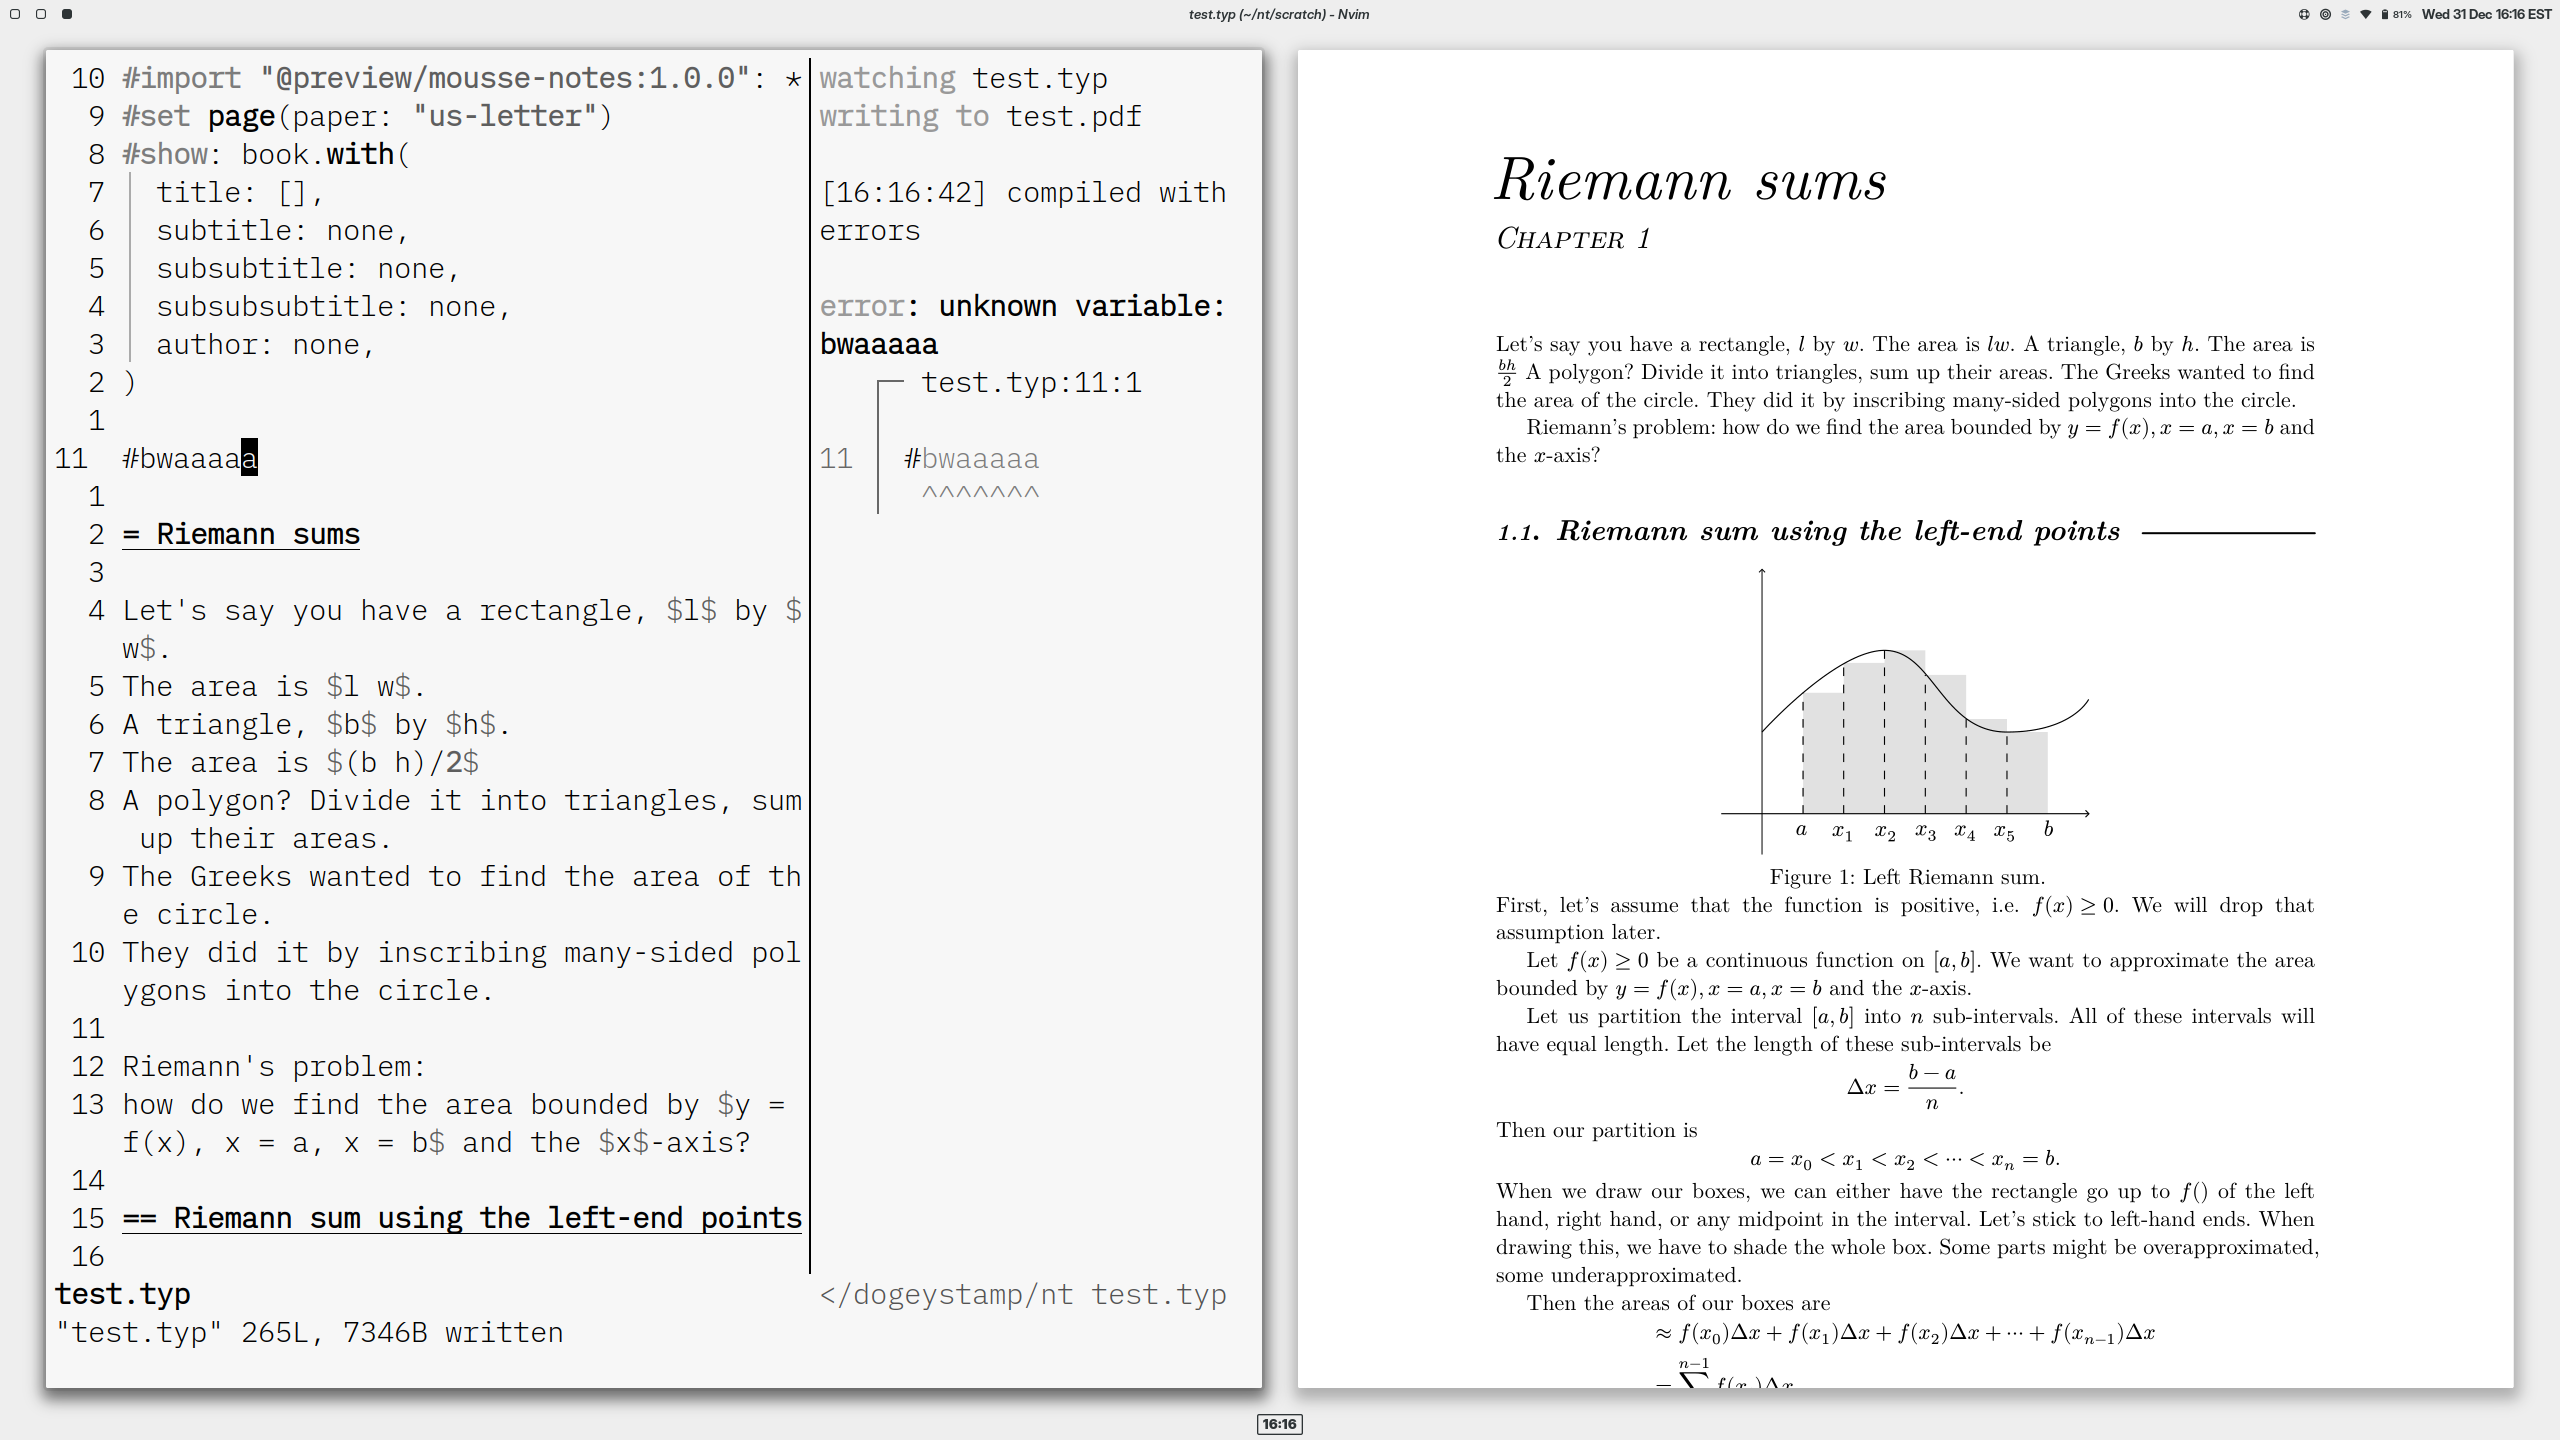
As you can see, errors are also displayed in the side pane.
Note: A difference from the original code is that we now have to set a compilation root for Typst. If your file accesses external data (e.g. images on disk), the data needs to be within the compilation root. (This feature prevents Typst files from reading your SSH private keys.) For my setup, I set the root of my notes Git repository as the compilation root.
Terminal Navigation
To take notes, you first need to be able to navigate to the folder where your notes are, and open Neovim there. I’ve optimized this part of the workflow using zoxide and fish.
Zoxide is a “smarter cd command”,
which lets you cd to directories without typing their full name.
For instance, my notes are all in folders like ~/nt/university/25/term1/coursename,
which would be tedious to type every time.
But with Zoxide, I can write z nt course and it will jump to the correct directory.
Fish is a shell which is much much much better than bash by default.
One of Fish’s great features is autosuggestions:
when you type the start of a command, it will suggest commands from your history, which you can accept with Ctrl-F.
As you can see here, I can type just z and it will complete the entire command:
Fish autosuggestions save lots of typing, and the best part is that fish includes this feature right out of the box. There’s zero configuration3 for all good features in fish; just install it, and it’s an amazing shell right out of the box. Both Fish and Zoxide are cool because they save me immense amounts of time in any context in the terminal, not just taking notes.
Now that you understand the tools, here’s the process for opening notes at lightning speed:
- Open a terminal using a shortcut in my tiling window manager.
- Run
z nt [course code]to get to a course’s notes folder. - Run
nvim main.typ(I just have to typenvand fish completes the rest). - Press
,fc(start compiling Typst) and,fr(open Zathura on this file). - Start writing.
Note: (2026-01-18) Thanks to the reader who wrote to me saying navigating directories added lots of friction to writing Typst with Neovim. I realized I didn’t mention anything about zoxide and fish, which are tools I take for granted, but make the terminal experience so much more fun; I’ve now added this section to explain how fish and zoxide improve my workflow.
Tinymist
Since 2023, many things have changed in the Typst ecosystem. We now have proper Language Server Protocol (LSP) server support for Typst, which helps editors understand and manipulate Typst code. You can install the Tinymist language server, which has many features, like autocomplete, error detection, code formatting, and notably instant preview in a browser window. Every time you edit the document, Tinymist automatically compiles it and shows you a preview. You can even click in the preview, and have it sync position with the editor window:
The one issue I have with Tinymist is that using it drains battery on my laptop (based on personal experience) which is a big disadvantage when typing notes in class. I assume this is caused by Tinymist recompiling at every keystroke rather than every time the file is saved. Because it consumes more power, I actually don’t use Tinymist that often, except for writing libraries in Typst.
To keep this post brief, I’ll avoid specifying too many details about how to set up language servers in Neovim; there is plenty of information out there already, and the configuration depends on how your specific setup works. One thing I will add here is that once you have Tinymist running, you can start the preview with the following Lua command (which you should bind to a key):
vim.lsp.get_clients({ name = "tinymist" })[1]:exec_cmd({ command = "tinymist.startDefaultPreview", title = "Preview" })
Note: If you hate having to configure everything but still like Vim-style editing, try the Helix editor, which automatically configures language servers (and many other features) for you. Once you have Tinymist running, use this command to start the preview:
:lsp-workspace-command tinymist.startDefaultPreview
I am looking to switch to Helix, but as of now the snippet support isn’t good enough.
Math & code
I often need to include math, and sometimes code in my notes. Typst is good at handling either of these.
Math
To write inline math, write $1 + 1 = 2$ (no spaces),
and to write display math, write
$
1 + 1 = 2.
$
(Configure your auto-pairs plugin to recognize $ in Typst files.)
You can write multiline equations with \, and align them with &, for instance
$
2 &= 1 + 1 \
  &= 1 + 1 - 1 + 1
$
gives this output:

As I mentioned above, the best part of Typst is how concise it is compared to LaTeX.
Instead of \frac{3}{2}, you can write 3/2,
and instead of \mathbb{R}, it’s just RR.
This conciseness is especially good for people like me who are typing lecture notes in real time in class.
At this point, I can sometimes type math faster than teachers can write it on the board.
See typst-undergradmath for a long list of examples of typesetting math in Typst.
Some things are still a bit tedious to write, though.
For instance, to type a sigma sum, you need to type sum_(i=1)^n.
While typing this expression, I mainly don’t like reaching my fingers off the home-row to reach the ^ key.
A similar issue occurs with definite integrals, which are written integral_a^b.
To optimize typing math, I use snippets in Neovim, specifically using the LuaSnip plugin.4
Snippets are like textual templates that let you fill in the blanks.
When I type sum and then press Tab, it autocompletes the sum notation sum_()^():
Unlike in LaTeX though, snippets are more a convenience rather than a necessity for typing fast, since Typst syntax is already short by itself. I would say that even without snippets, as long as you type fast, you can write Typst markup as fast as a lecturer writes on the board.
Snippets are also nice to use in other contexts,
like completing today to 2026-01-01 in a journal file.
Code
Other than math, you might also want to write code blocks in Typst. Doing this is easy, and it uses the exact same notation as in Markdown, i.e. single ticks for inline code, and three backticks for code blocks:
This is `code`.

```python
print("this is code")
```

It’s just like typing code on Discord, and it even has syntax highlighting out of the box.
Figures
Another essential feature for writing lecture notes is drawing figures. The system I use is still generally the same as Gilles Castel’s method: draw figures in Inkscape, and include them in the Typst document. However, compared to 2023, my setup is a bit different. This is what the workflow looks like:
When writing notes, whenever I want to insert a figure, I use a fig snippet,
which inserts code like this:
#figure(
  image("fig/test2/label.svg"),
  caption: [Caption],
) <label>
(The label and Caption bits are blanks in the snippet that I fill in, and
test2 is the filename of the document.) Then, after naming the figure, I
hover over the filename and press a keybind to edit the figure. The keybind triggers a script (typst-figure)
which creates the file if it doesn’t exist, and then opens Inkscape.
One important difference from my old setup is that I now use the
TexText plugin to insert Typst math expressions
in my figures. I edited the source code in my version of TexText so that the “save text”
bind is Ctrl-s, which can be pressed by the left hand while my right hand
draws with the mouse.
Another difference is that I no longer use Gilles Castel’s Inkscape Shortcut Manager,
and instead just use the default Inkscape binds (which aren’t too bad actually).5
Something I did keep from Castel’s setup is the quick style changer. He had “chorded” style keybinds:
- Space + A: arrow
- Space + A + G: bold6 arrow
- Space + S: stroke
- Space + S + G: bold stroke
and so on for a bunch of different styles. This lets you switch styles much
faster than Inkscape’s default binds. One issue I ran into using the style
switcher is that it needs a hacky X11 key event interceptor to make the binds
work. Since I switched to Wayland, that doesn’t work anymore. Now, I have
extracted Gilles’ style code to a Python
script,
and I connect it to fuzzel (which is like rofi for Wayland) in a style
switcher shell
script.
Then, I use my window manager’s binds to trigger this style script. So the
process in Inkscape to switch styles becomes:
- Press Mod+A (calls style switcher).
- Type the bind (e.g.
agfor bold arrow) and press Enter7; this copies the style to clipboard. - Select an object in Inkscape and Ctrl+Shift+V to paste the style on it.
Admittedly, this method is slower, but it is more robust and will not break the moment I switch window managers.
It even has the potential to work on Windows, provided you have a replacement for fuzzel and the clipboard tools.
Castel claimed to be able to draw figures with his tools as fast as the instructors could draw them on the board, but I still don’t have enough experience after two years to do that yet. Perhaps I just don’t draw that many figures in my lecture notes. Or maybe, my tooling is just not on his level.
Scripting
Typst is great not only because it’s nice to typeset with,
but also because it has a sane scripting language built in.
Typst is divided into a markup mode (i.e. normal, formatted text),
and code mode, where you can write scripts.
You enter code mode by typing #, and in code mode you can introduce markup with [].
Here are a few examples. If you need a small function that makes text bold and italic and smallcaps, Typst has got you:
This is *markup* mode text

#let very-emph = (content) => strong(emph(smallcaps(content)))

#very-emph[
  This is highly emphasized _markup._
]

(#very-emph[...] is shorthand for #very-emph([...]) which is calling the function very-emph on content.)
If you want to make something render conditionally, Typst can also do that:
#if 1 + 1 == 2 [
    We have $1 + 1 = 2$.
] else [
    We have $1 + 1 != 2$??
]

Generally, I’d say that if you are used to regular programming languages like JavaScript, Typst’s scripting syntax will feel intuitive for you. See the later chapters of the Typst tutorial for more details.
I often use Typst’s scripting system for little things like making my own shorthands in math mode. For instance, I shorten the common real coordinate spaces like this:
#let Rn = $RR^n$
#let R2 = $RR^2$
#let R3 = $RR^3$
#let R4 = $RR^4$
So anywhere in math where I need to type ℝ², I can type R2, and so on for the others.
Another example is in a resume, where I make a template to format a section:
#let entry = (title, body) => {
  v(1.25em, weak: true)
  box(
    heading(title)
      + v(weak: true, 0.25em)
      + line(length: 100%, stroke: 0.7pt + black)
      + v(weak: true, 0.75em)
      + box(inset: (left: 0.75em), body),
  )
}

#entry[Education][
    *University of Ipsum* \
    _Bachelor of Something_
]
#entry[Skills][
    - Writing long-winded blog posts
    - Rust
]

These are simple examples, and Typst’s scripting language can do much more than that. For instance, I made a “smart” calendar powered by Typst’s scripting system.
Templates
Templates in Typst are like that resume entry function I wrote in the above section, but more featureful.
Authors write packages which expose a template function;
you call that function with the content of your document,
and the template configures the paper size, font, layout, and so on.
Templates separate content from style, and ensure you can focus on just writing.
In 2023, I rolled my own system for templates; I included all my
template code in a .typ file and imported it in each new document I made.
This was painful to use because there was no standard file path to import
templates from; I had to place documents next to the template, and import
by relative path, like ../../template.typ.
Soon after I wrote that article, Typst made their own official packaging system
to easily distribute files like templates. Now, template authors publish
packages to the Typst Universe
registry.8 This way, documents are self-contained: rather than
importing ../../template.typ, which might only exist on your computer, you
import the standard package @preview/my-great-template:1.2.3. You can send a
single .typ document to other people, or edit it on the Typst web app, and it
will work just fine.
Now, whenever I want to start a new document, I can create a new .typ file
anywhere, and import my template with this code snippet:
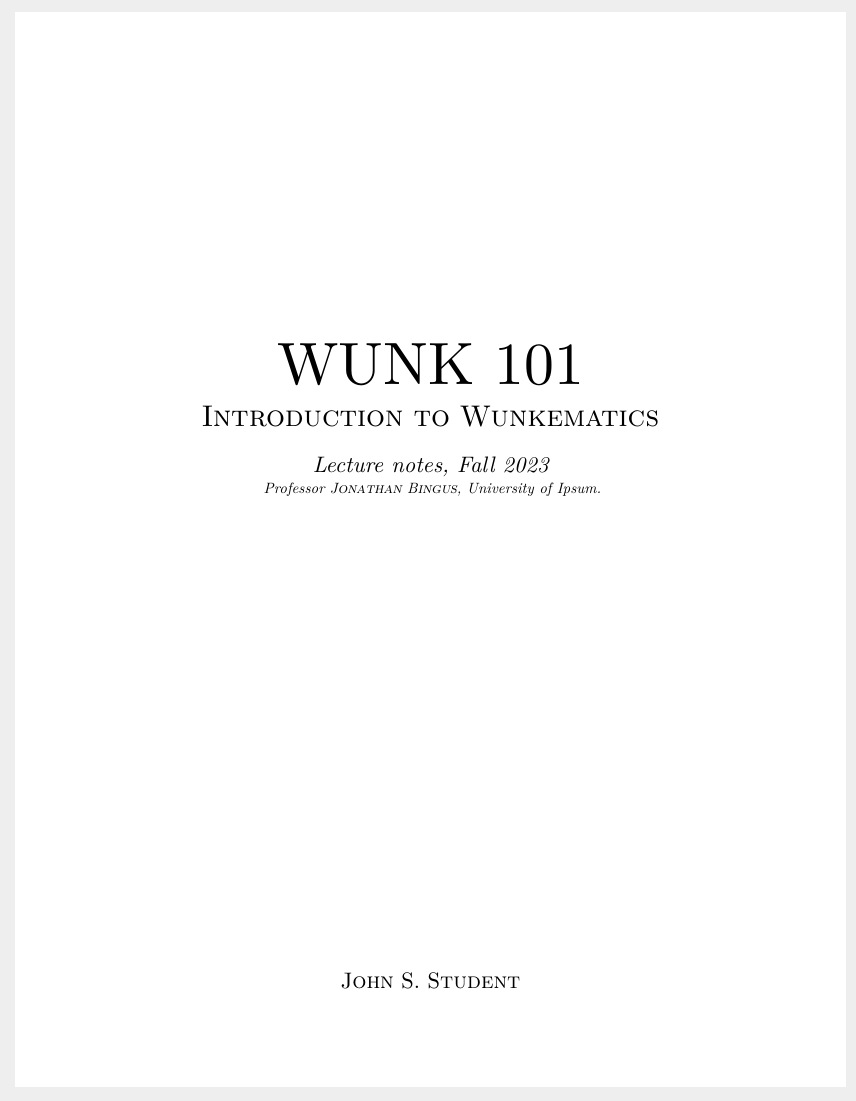
#import "@preview/mousse-notes:1.0.0": *
#set page(paper: "us-letter")
#show: book.with(
  title: [WUNK 101],
  subtitle: [Introduction to Wunkematics],
  subsubtitle: [Lecture notes, Fall 2023],
  subsubsubtitle: [Professor #smallcaps[Jonathan Bingus], University of Ipsum.],
  author: "John S. Student",
)
Note: book is just a function I wrote which takes content and transforms it,
and show is syntax that says “call this function on the entire document.”
It’s cleaner than wrapping the entire document’s content with a function call.
Or, even easier, I can paste the above boilerplate code with this single command:
typst init @preview/mousse-notes dir
which creates a notes file at dir/main.typ.
My template is available at its GitHub
repo. And if you want to use my
template, you can run typst init @preview/mousse-notes on your device too.
Another thing I do differently than in 2023 is the organization of my notes. In the past, I would make a new document for each chapter of a course; now, each course’s notes are contained in a “book” compiled from a single Typst document. Practically speaking, this means I only need to write the document boilerplate once at the start of each term, when I’m creating each course’s notes document.
Plugins
Typst Universe doesn’t just host templates; it also hosts plugins, which are also .typ scripts.
A lot of these are useful, for example whalogen
provides shortcuts to type chemical equations,
and metro lets you type units.
It is even possible to run Python in Typst.
For many tasks though, plugins aren’t strictly necessary.
With whalogen, you can type #ce("HCl + H2O -> H3O+ + Cl-"),
and without the plugin, it’s just longer: $"HCl" + "H"_2"O" -> "H"_3"O"^+ + "Cl"^-$.
I personally dislike having extra dependencies, because it creates more maintenance burden. Oftentimes, the Typst compiler will have a breaking change (a downside of using software that is in its growth phase), and one of the plugins I use will break, or have annoying deprecation warnings.
Nowadays, I don’t use external plugins anymore: my template includes my own
implementations of #theorem, #definition, #example, and so on. If it
breaks, it’s my fault solely, which is good because then I can fix the issue
myself.
Synchronizing notes
You may want to synchronize your Typst files so you can write on multiple devices. There are a few ways to do this.
- Personally, I use Git to manage my notes. The main advantage of Git is that it is the industry standard for working with source code, and it is a highly reliable tool. The disadvantage is that you need to commit and push changes manually, which you might forget to do. (I mainly write on a single device, so this is fine.)
- You could use Syncthing, which automatically syncs files across your devices. It just works. One annoying thing is that when there are sync conflicts, Syncthing will not notify you and it will instead create a “sync-conflict” file.
- The most practical option (but one that goes against the idea of using local open-source tools) is to use the official closed-source web app for Typst. Unlike the two other options, you need to be online to access the web app. However, the web app synchronizes documents perfectly and lets you collaborate in real time with other people.
For the first two options, make sure that you exclude .pdf outputs in .gitignore or .stignore
to save storage and bandwidth.
Conclusion
That’s all for how my current note-taking setup works. A general theme comparing the 2026 setup to the 2023 setup is that I’ve aimed for more minimalism and simplicity: a system with less moving parts is more reliable, and easier to maintain.
Notably, all my documents are now fully self-contained: they import my template from the standardized package registry rather than from a relative path, and they do not have external links. If you’ve read the 2023 version of this post, you’ll see that I created a convoluted setup to link between different PDF files. I spent much effort building the link system, only to never use it. Now, my documents are formatted as books that comprehensively cover one subject, so that I only need to link within documents (which is a feature Typst and PDF readers have good support for).9
Another way I’ve simplified the note-taking system is to trim out a lot of brittle external code and dependencies. I’ve trimmed down Castel’s Inkscape tools to the bare minimum, leaving only the style code itself, and as mentioned above, I’ve stopped using external Typst plugins. The projects I do rely on are generally well-maintained, like the Neovim editor, the Typst compiler itself, and TexText.
Looking forward to the future, I mainly wish I could reduce the complexity in my Neovim configuration. That is, I want to stop using as many third party plugins. The Helix editor (mentioned above) is quite promising in that a lot of the functionality in Neovim plugins (surround, Git gutter, telescope, lspconfig, tree-sitter, …) is available out of the box in Helix and maintained by their team. Once they have solid snippet support, I’ll switch fully to Helix and I’ll never again have to think about my huge Neovim configuration file, and the headache of configuring a dozen plugins.
Thanks for reading this far. If you have any questions or comments regarding this post, please do write to me, and I’ll be happy to reply to you.
Appendix: Configuration files
To keep this post brief, I did not include most of my configuration code. If you want to replicate my setup, here are the relevant configuration files on GitHub:
ftplugin/typst.vim(bind fortypst watch)ftplugin/typst.lua(tinymist)snippets/typst.lua(snippets)typst-figure(shell script to create figures)stylinator.py(Inkscape quick style script)style.sh(frontend tostylinator.py)
Edits:
- (2026-01-18) Added section about zoxide and fish, made article reflect that mousse-notes is now on Typst Universe, changed examples of scripting
-
In fact, I moved to a new school a while ago, and some students I met there had already read my post. Hi :) ↩
-
This is, of course, just my personal opinion. ↩
-
Looking at you, zsh. ↩
-
In 2023, I used UltiSnips, but I got tired of it complaining about pynvim being missing on all my devices. ↩
-
Some of the binds I use are “toggle snap to grid” (%), “toggle grid” (#), the curve drawing tool (b), rectangle and circle (F4, F5). ↩
-
I bound Shift + V as Enter in fuzzel, so that my left hand can reach better. ↩
-
Or you can “publish” packages to a standard local folder on your computer. ↩
-
Removing inter-document links and enforcing a rule of “one subject, one document” is perhaps not ideal for those who want a personal knowledge management system, but it is good for writing course notes. ↩